How to Grow Cabbage at Home | Easy growing guide
How to grow cabbage at home. Cabbage taste wonderful! My childhood memories of cabbage are of a limp, soggy vegetable on my dinner plate. However, freshly harvested, homegrown cabbage does not need to be cooked for very long at all and will keep a bright color, firm texture and superior taste.
Homegrown cabbage without seeds
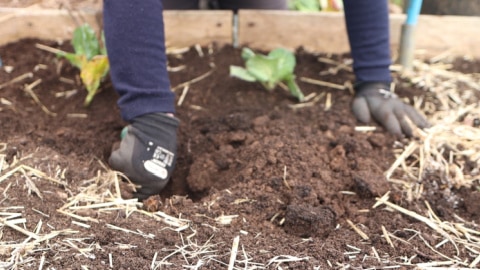
Prepare the growing bed for young cabbage plants
Clear away any debris, decaying plants and other organic materials. Apply a mulch of homemade compost either now or after planting. There is no need to dig the bed that will have cabbages growing in it. Cabbages prefer firm soil and digging the soil can be detrimental to the soil structure.
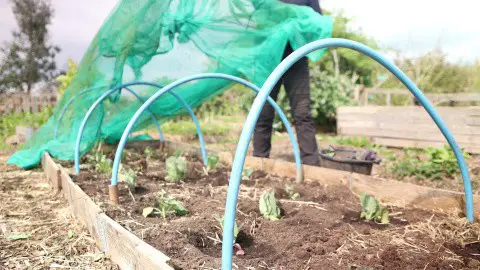
How to construct a low tunnel frame from recycled materials

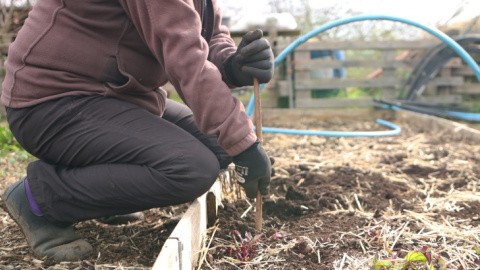
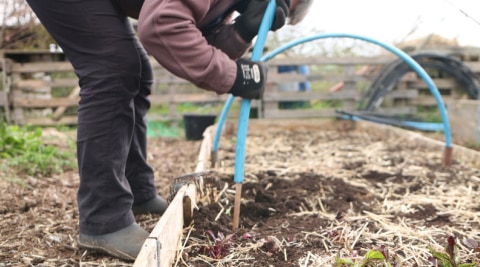
A) Push or thump short metal tubes into the ground each side of the growing bed. Recycled metal legs from garden trampolines are ideal. Insert lengths of MDPE piping (and in UK you can buy it here) into the tubes to form an arch. Repeat at an approximate distance of one metre, (that’s around three feet) along the length of the growing bed.
Or if you do not have access to recycled metal tubing –
B) Push short bamboo canes or sticks into the ground each side of the growing bed. Insert lengths of MDPE piping OVER the canes to form an arch across the growing bed and repeat at an approximate distance of one metre, (three feet).
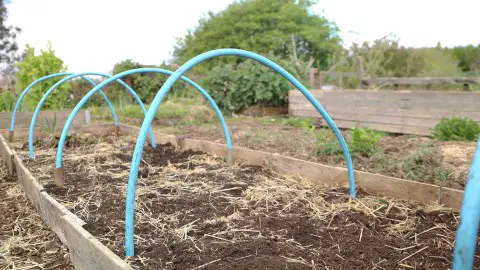
If you don’t have time or the recycled materials to build your own low tunnel, you can buy them ready made. Try Gardening Naturally for a range of low tunnels and walk-in tunnels that are easy to construct in your garden.
Choosing cabbage plants or starts
If you haven’t sown any seeds, all is not lost. You can buy ready-grown plants, either very young, called seedlings, or young plants, often called starts in USA. Many young plants are grown in controlled conditions and will need hardening off before planting out.
However, you can also buy field grown plants. Which I think are more useful when you have forgotten to sow seeds. Field grown plants are already accustomed to living outdoors and should be hardy, strong plants. They can be planted into your garden without the need for hardening off or protecting them from frost. I bought these from Cornish Cabbage Plants.
Preparing starts for planting
Young plants or starts may be dry. Particularly if you have purchased them online and they’ve been in the postal system for a few days. To give them the best chance in your garden, soak the young plants in a bucket or tray of water for at least 20 minutes. Don’t leave them in water overnight. Like many plants, your young cabbages won’t appreciate sitting in water for that length of time.
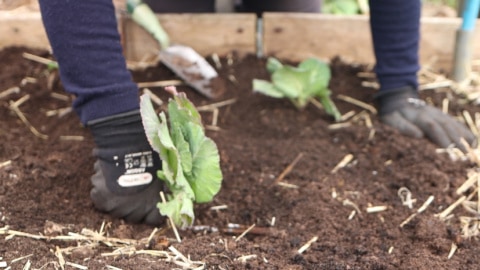
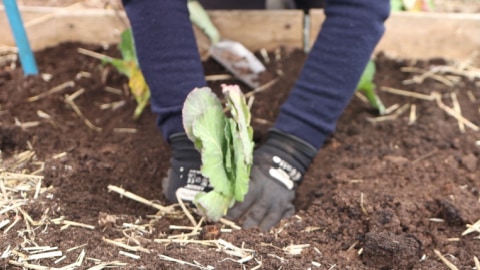
How to plant young plants or cabbage starts
Make a planting hole in the soil deep enough for the young plant to stand it so the the leaves are all above ground, but the stem will be under the soil.
Place and hold the plant in position while gently filling in the hole with soil. Gently firm the soil around the roots of the plant. Continue to fill and firm the soil. When the hole is filled with soil, firm around the plant once again.
Plant small or dwarf cabbages around 45-60cm (18 to 24 inches) apart in each direction and large cabbages around 90-120cm (3-4 feet apart). Don’t plant too close to the edges of the bed because the leaves will them press against the netting. When cabbage leaves are pushed up against the netting, butterflies and moths can land on the netting and lay their eggs through the netting. Cabbages can grow large!
Watering when you grow cabbage at home
Although not essential, I think it is good practice to create a ring or wall of soil around the plant about six to eight inches away from the stem, Ensure the soil slopes from the soil wall downwards towards the stem. This will encourage water to flow toward the plant and down to the roots, Less water will be wasted by flowing away from the plant.
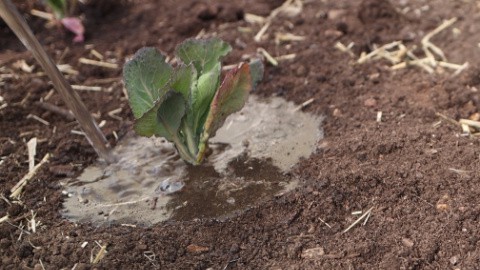
Water the young plants to settle them into the soil. This will help with roots to come into contact with the soil, helping the plants to grow more healthily and strongly.
Choose the right netting to protect cabbages
Cover the tubing tunnel frame with netting to prevent cabbage white butterflies and cabbage moths from laying their eggs on the young plants. Select a netting that has sufficiently small holes to prevent access to butterflies and moths while you grow cabbage at home. Netting that is designed to keep birds off crops is not fine enough for this task. I use scaffold debris netting and sew a line of stitching along the seams that have reinforced holes in them to close up the holes.
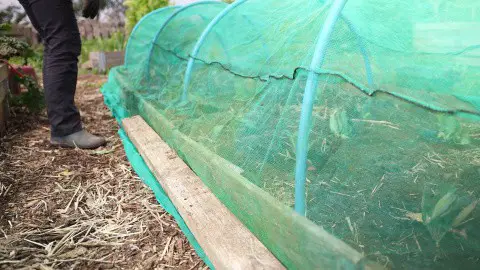
Drape the netting over the frame and down onto the ground each side of the bed. Secure in place with metal pegs or pins. bricks or stones or use lengths of wood to hold down the edges of the netting. You want to prevent the wind blowing the netting away and also to prevent access by butterflies and moths.
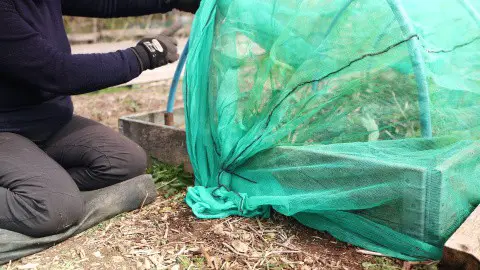
How to secure netting at the end of low tunnels
At each end of the tunnel, gather the surplus netting together in a bunch and secure with a cable tie or twine. Pull the netting around the corners of the bed and tuck under the bunch. Secure to the floor using a brick or a large metal garden staple.
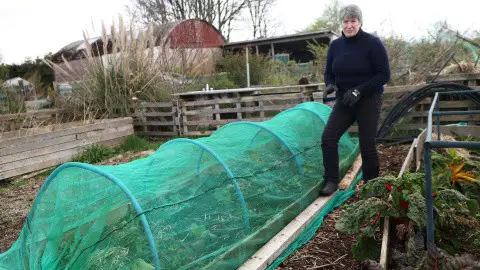
To access the bed, move the weights from one side of the bed and slide the netting up and over the hoop. Don’t forget to put it down again and weight it down when you have finished accessing the growing space.
Care of young plants
When you grow cabbage at home you need to water them regularly for the first month. A good soak once a week is much best. A little and often approach encourages shallow rooting and your plants will be stronger with deep roots that seek out nutrients at lower levels in the soil. They are also more likely to survive in dry spells if the roots are deeper in the soil. Depending on your soil condition, you might consider feeding the soil with a liquid feed like comfrey tea or nettle tea.
Growing on
Allow the cabbages to grow until ready to harvest. You do not need to harvest them all at once. In a temperate climate cabbages will sit in the ground for a weeks, allowing you to harvest them just before use in the kitchen.

- Plants to support wild birds - May 29, 2026
- 10 Plants with Apricot - May 8, 2026
- Garden flowers in November - May 3, 2026
I have never been able to grow good cruciferous vegetables where I live. This last year, I thought I would start my plants in Fall, over-winter in low tunnels, and then watch them reap my harvest in the spring. Instead, the plants had a lot of aphid pressure and bolted very quickly. A little disappointing! But the chickens will get the benefit…I guess I should start cabbage in the spring?